Vise Stop Project: A Journey in Precision Machining
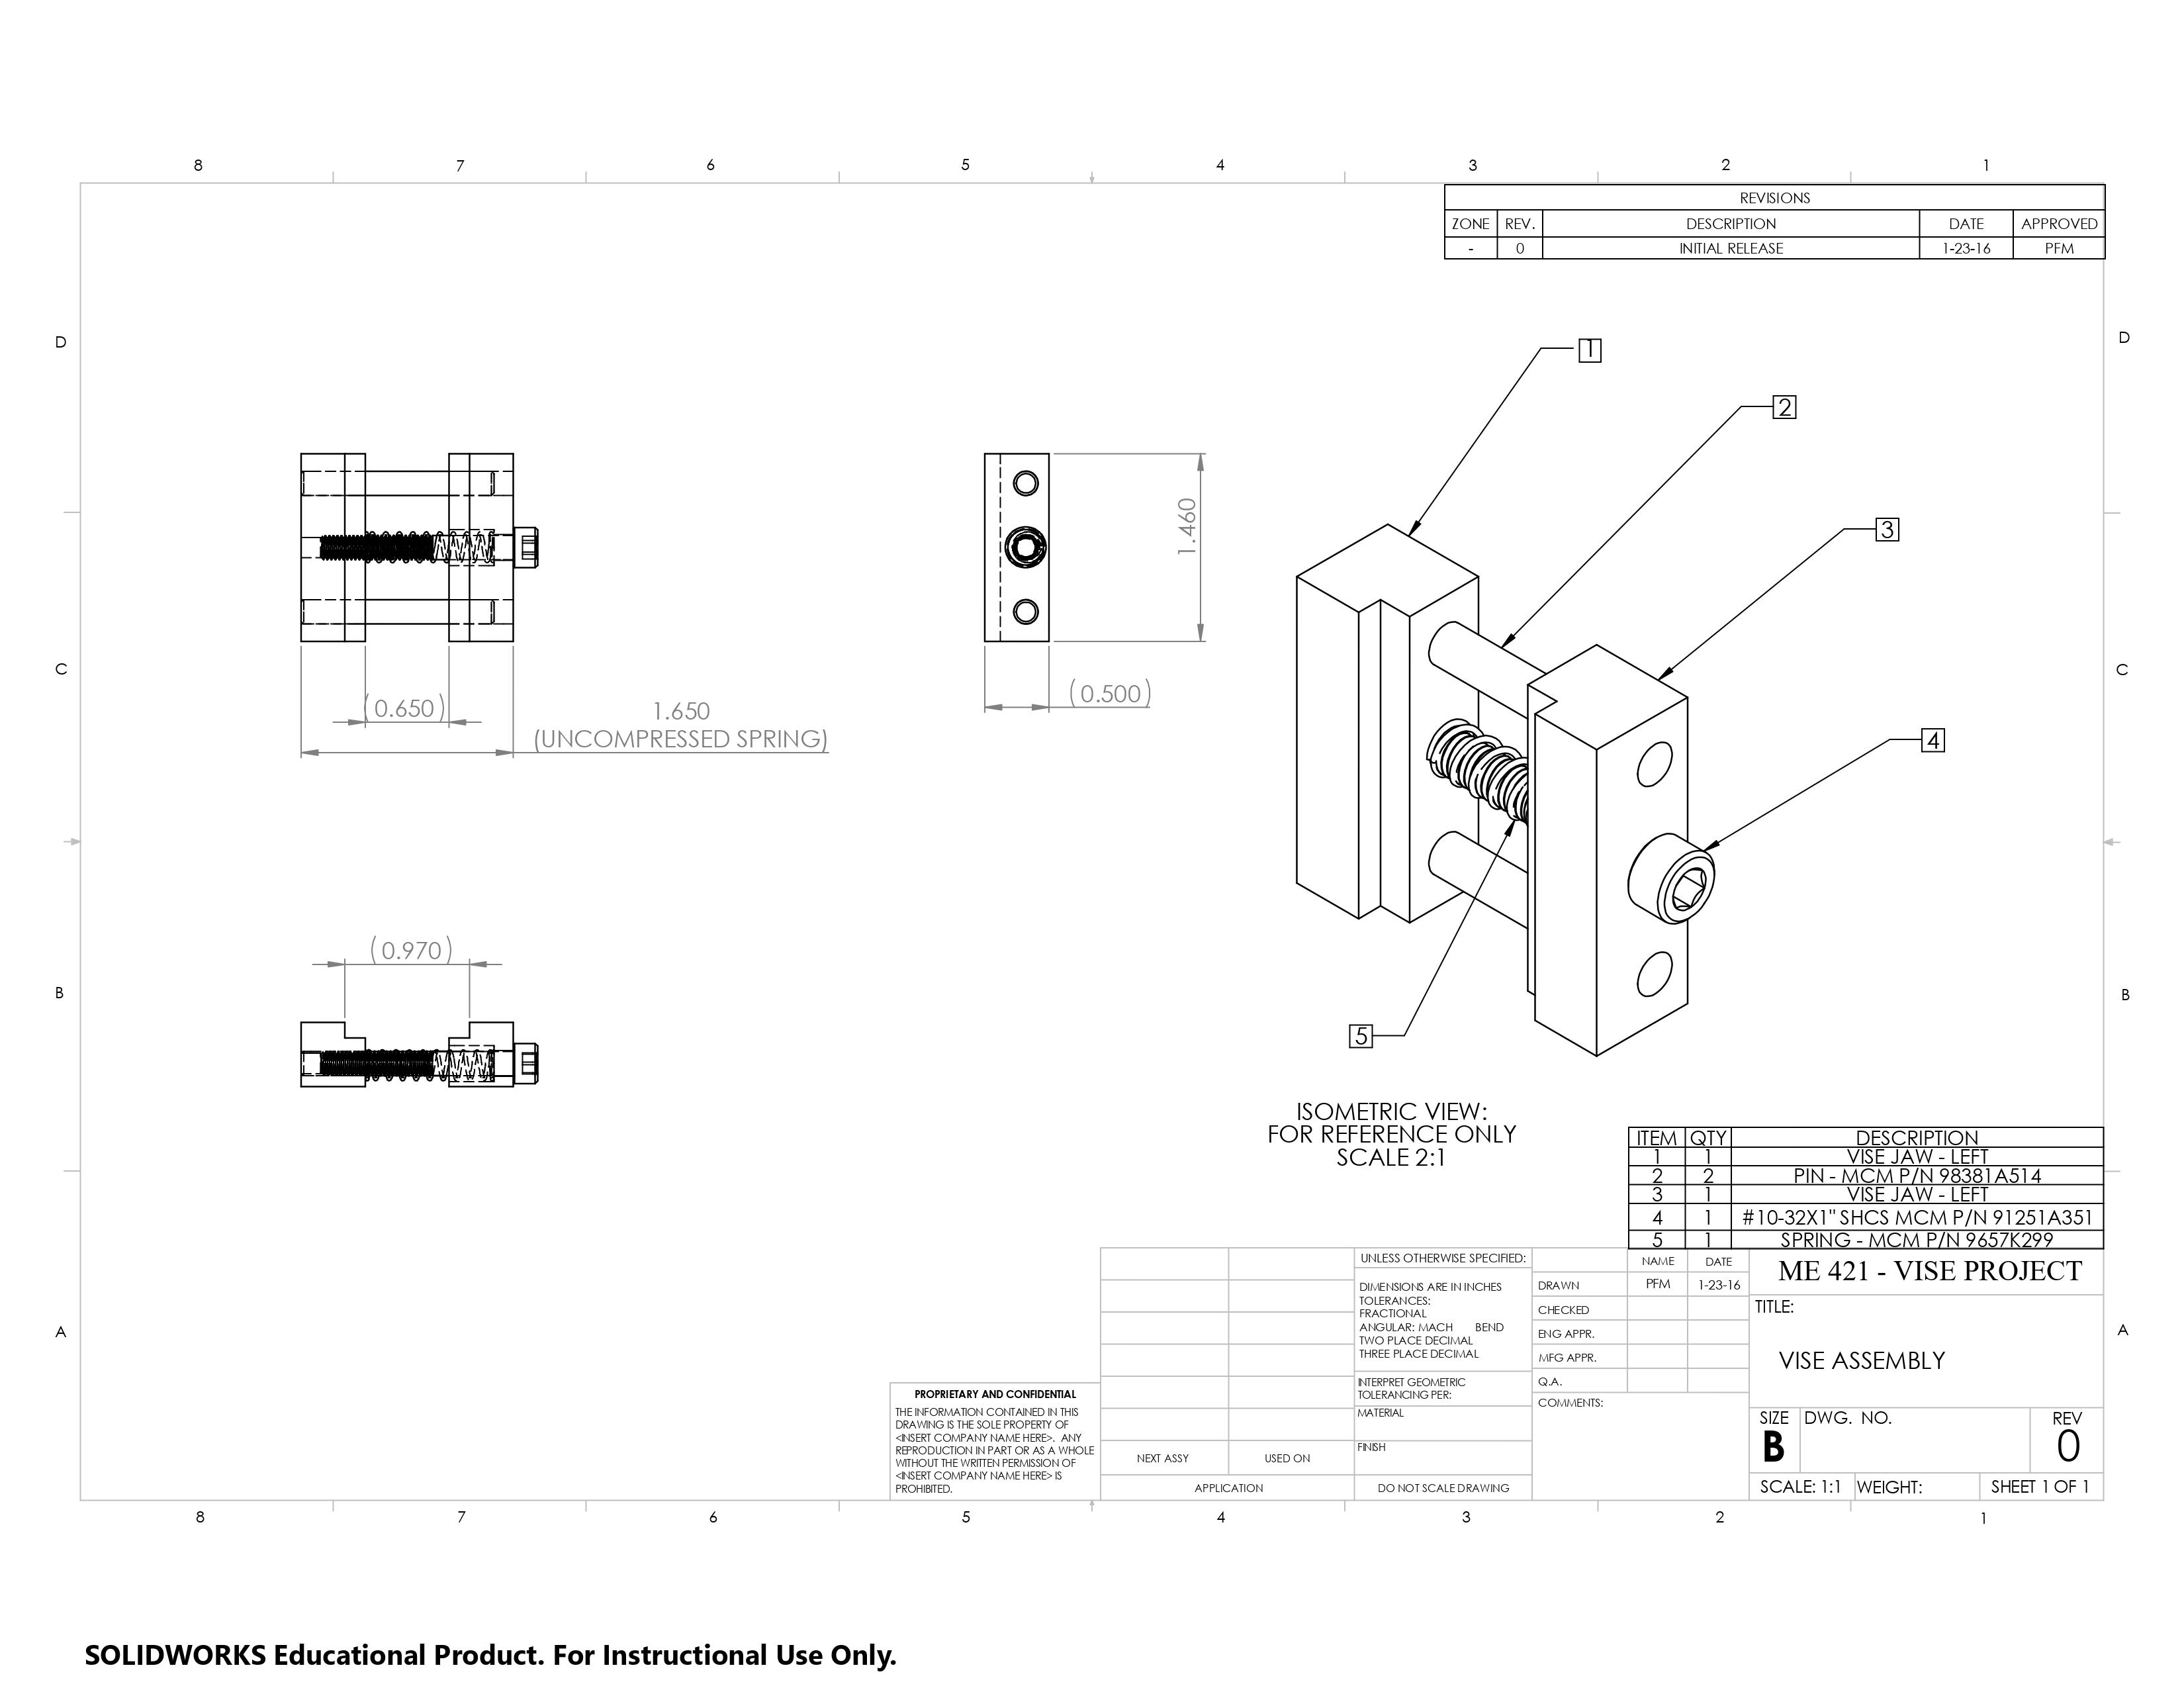
In the Vise Stop project, my objective was to create a highly functional and precision-machined tool. This project was not just a test of my machining skills but also an opportunity to apply mechanical engineering principles in a practical setting. The vise stop, a crucial component in machining operations, required precise construction to ensure its effectiveness in holding workpieces steady. The project began with an in-depth analysis of the provided blueprints, which detailed every aspect of the vise stop's design, from individual components to assembly instructions.
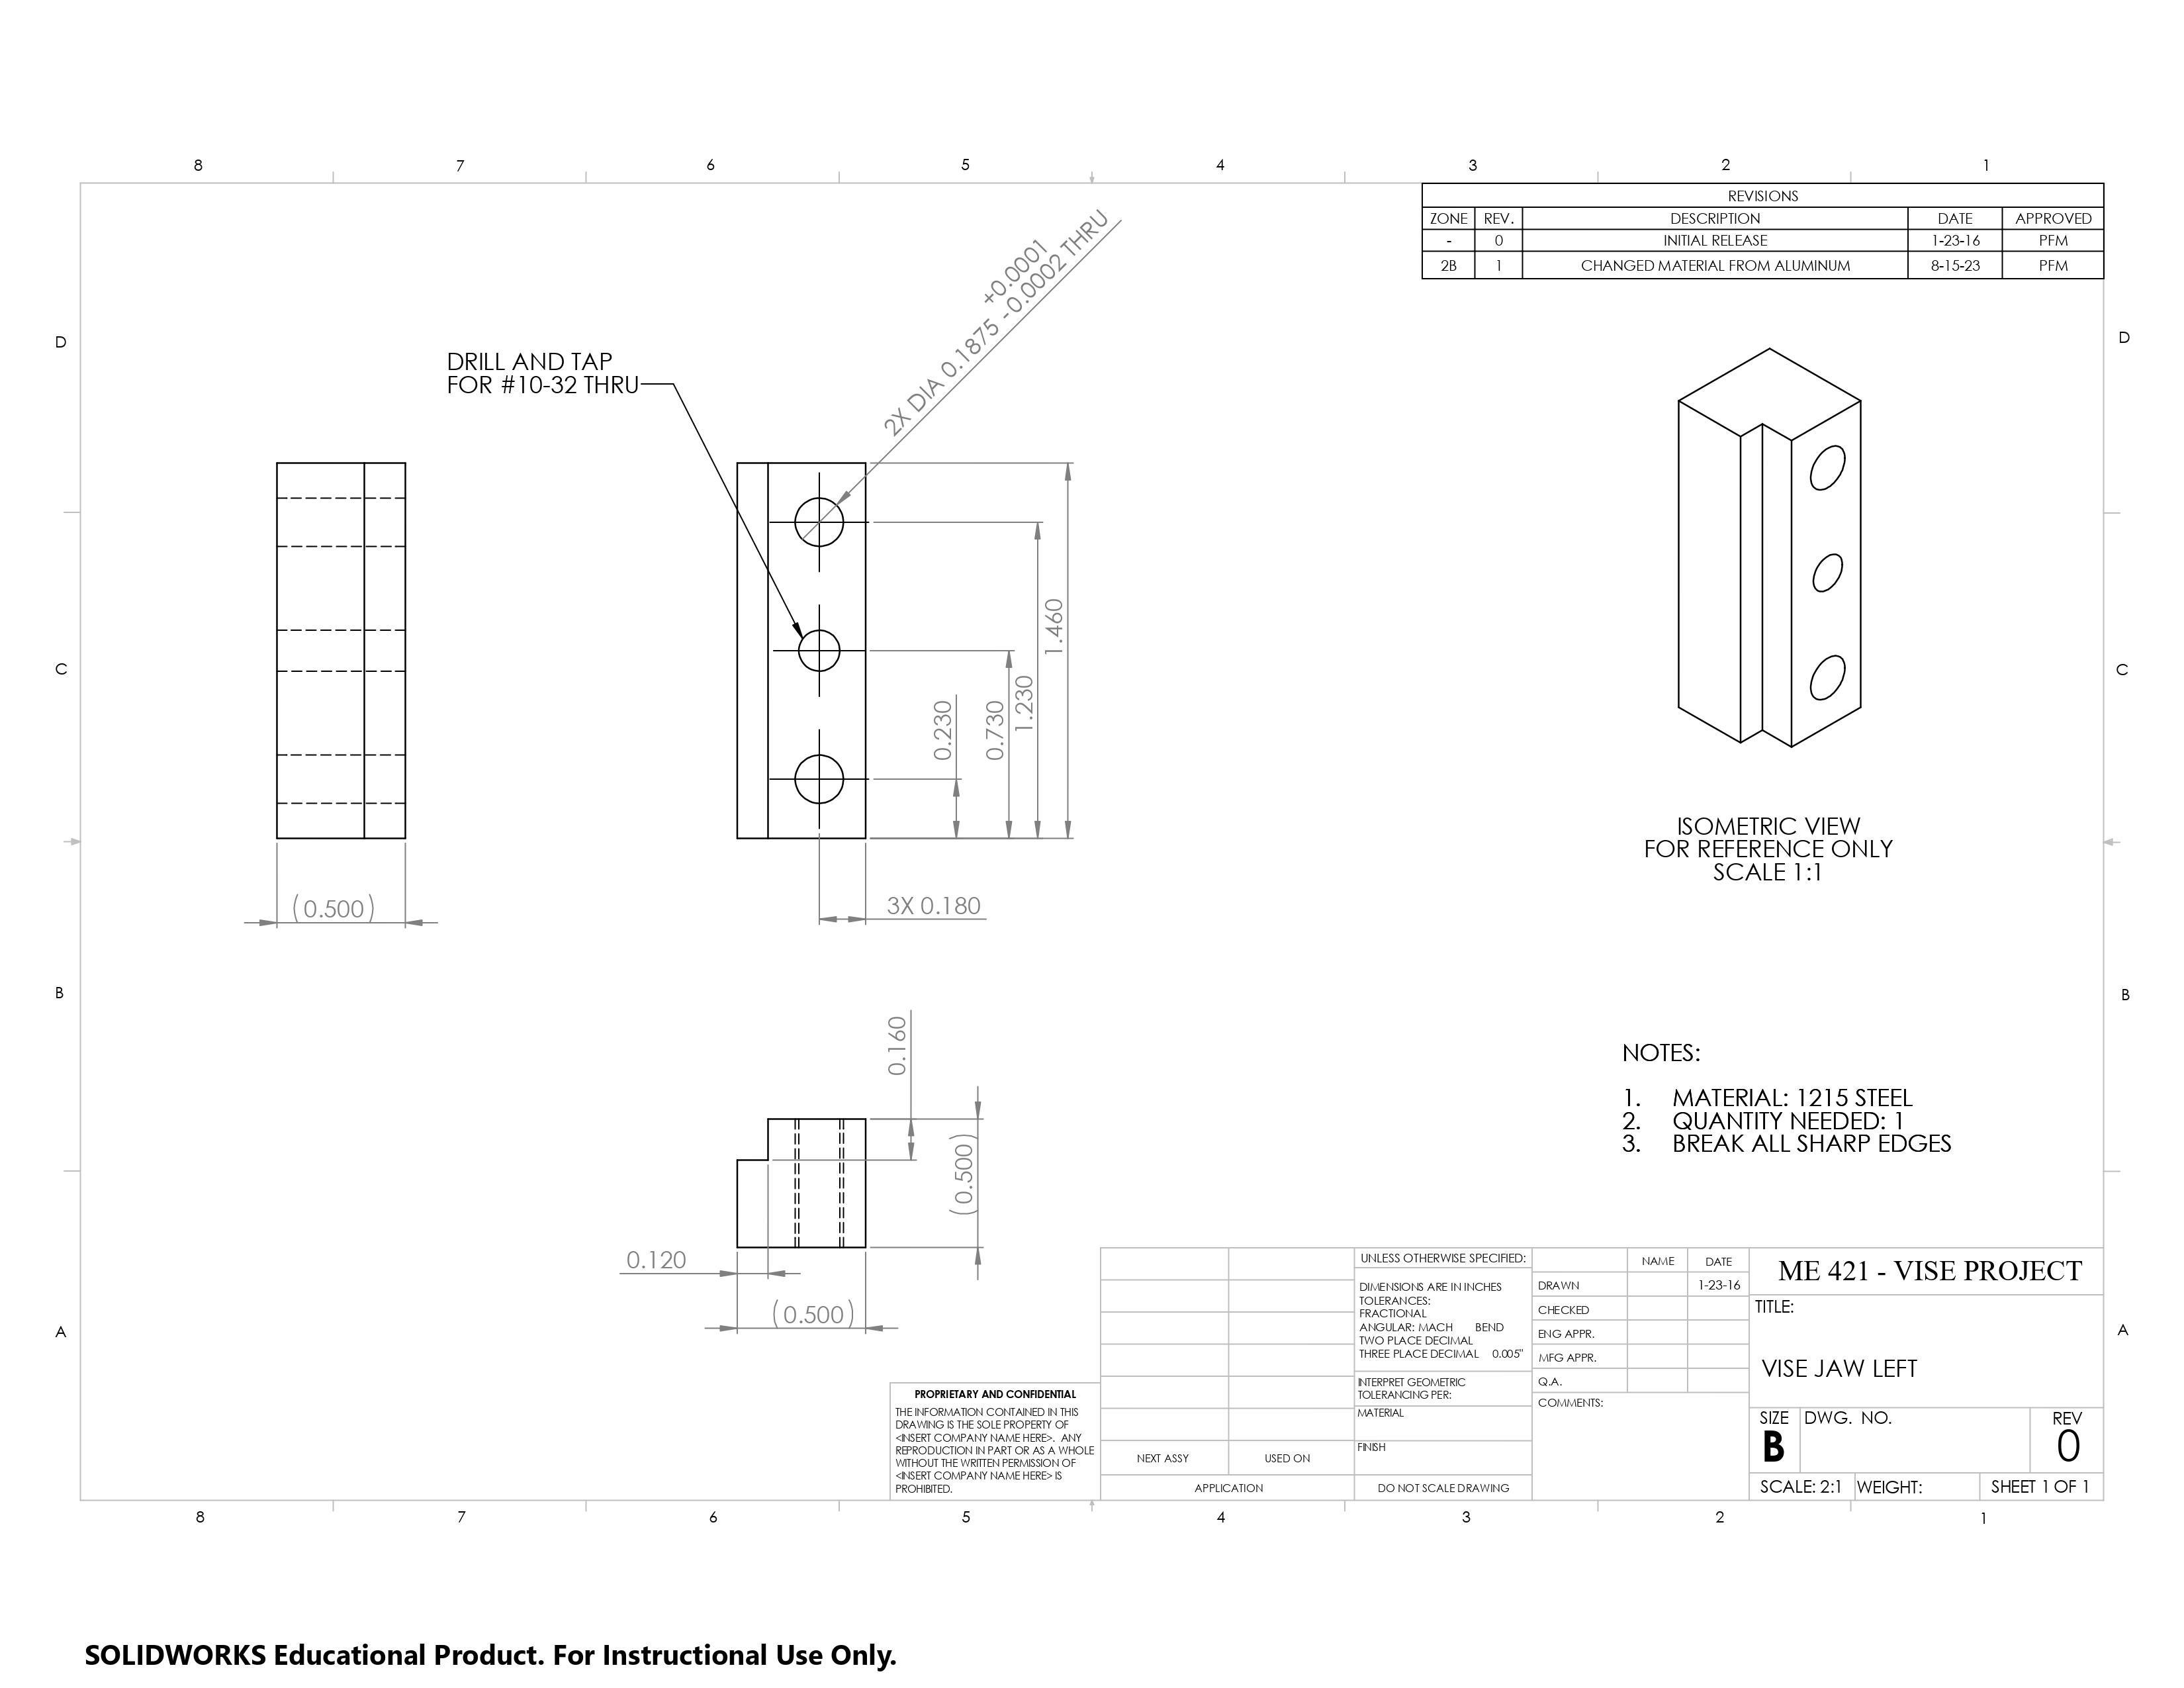
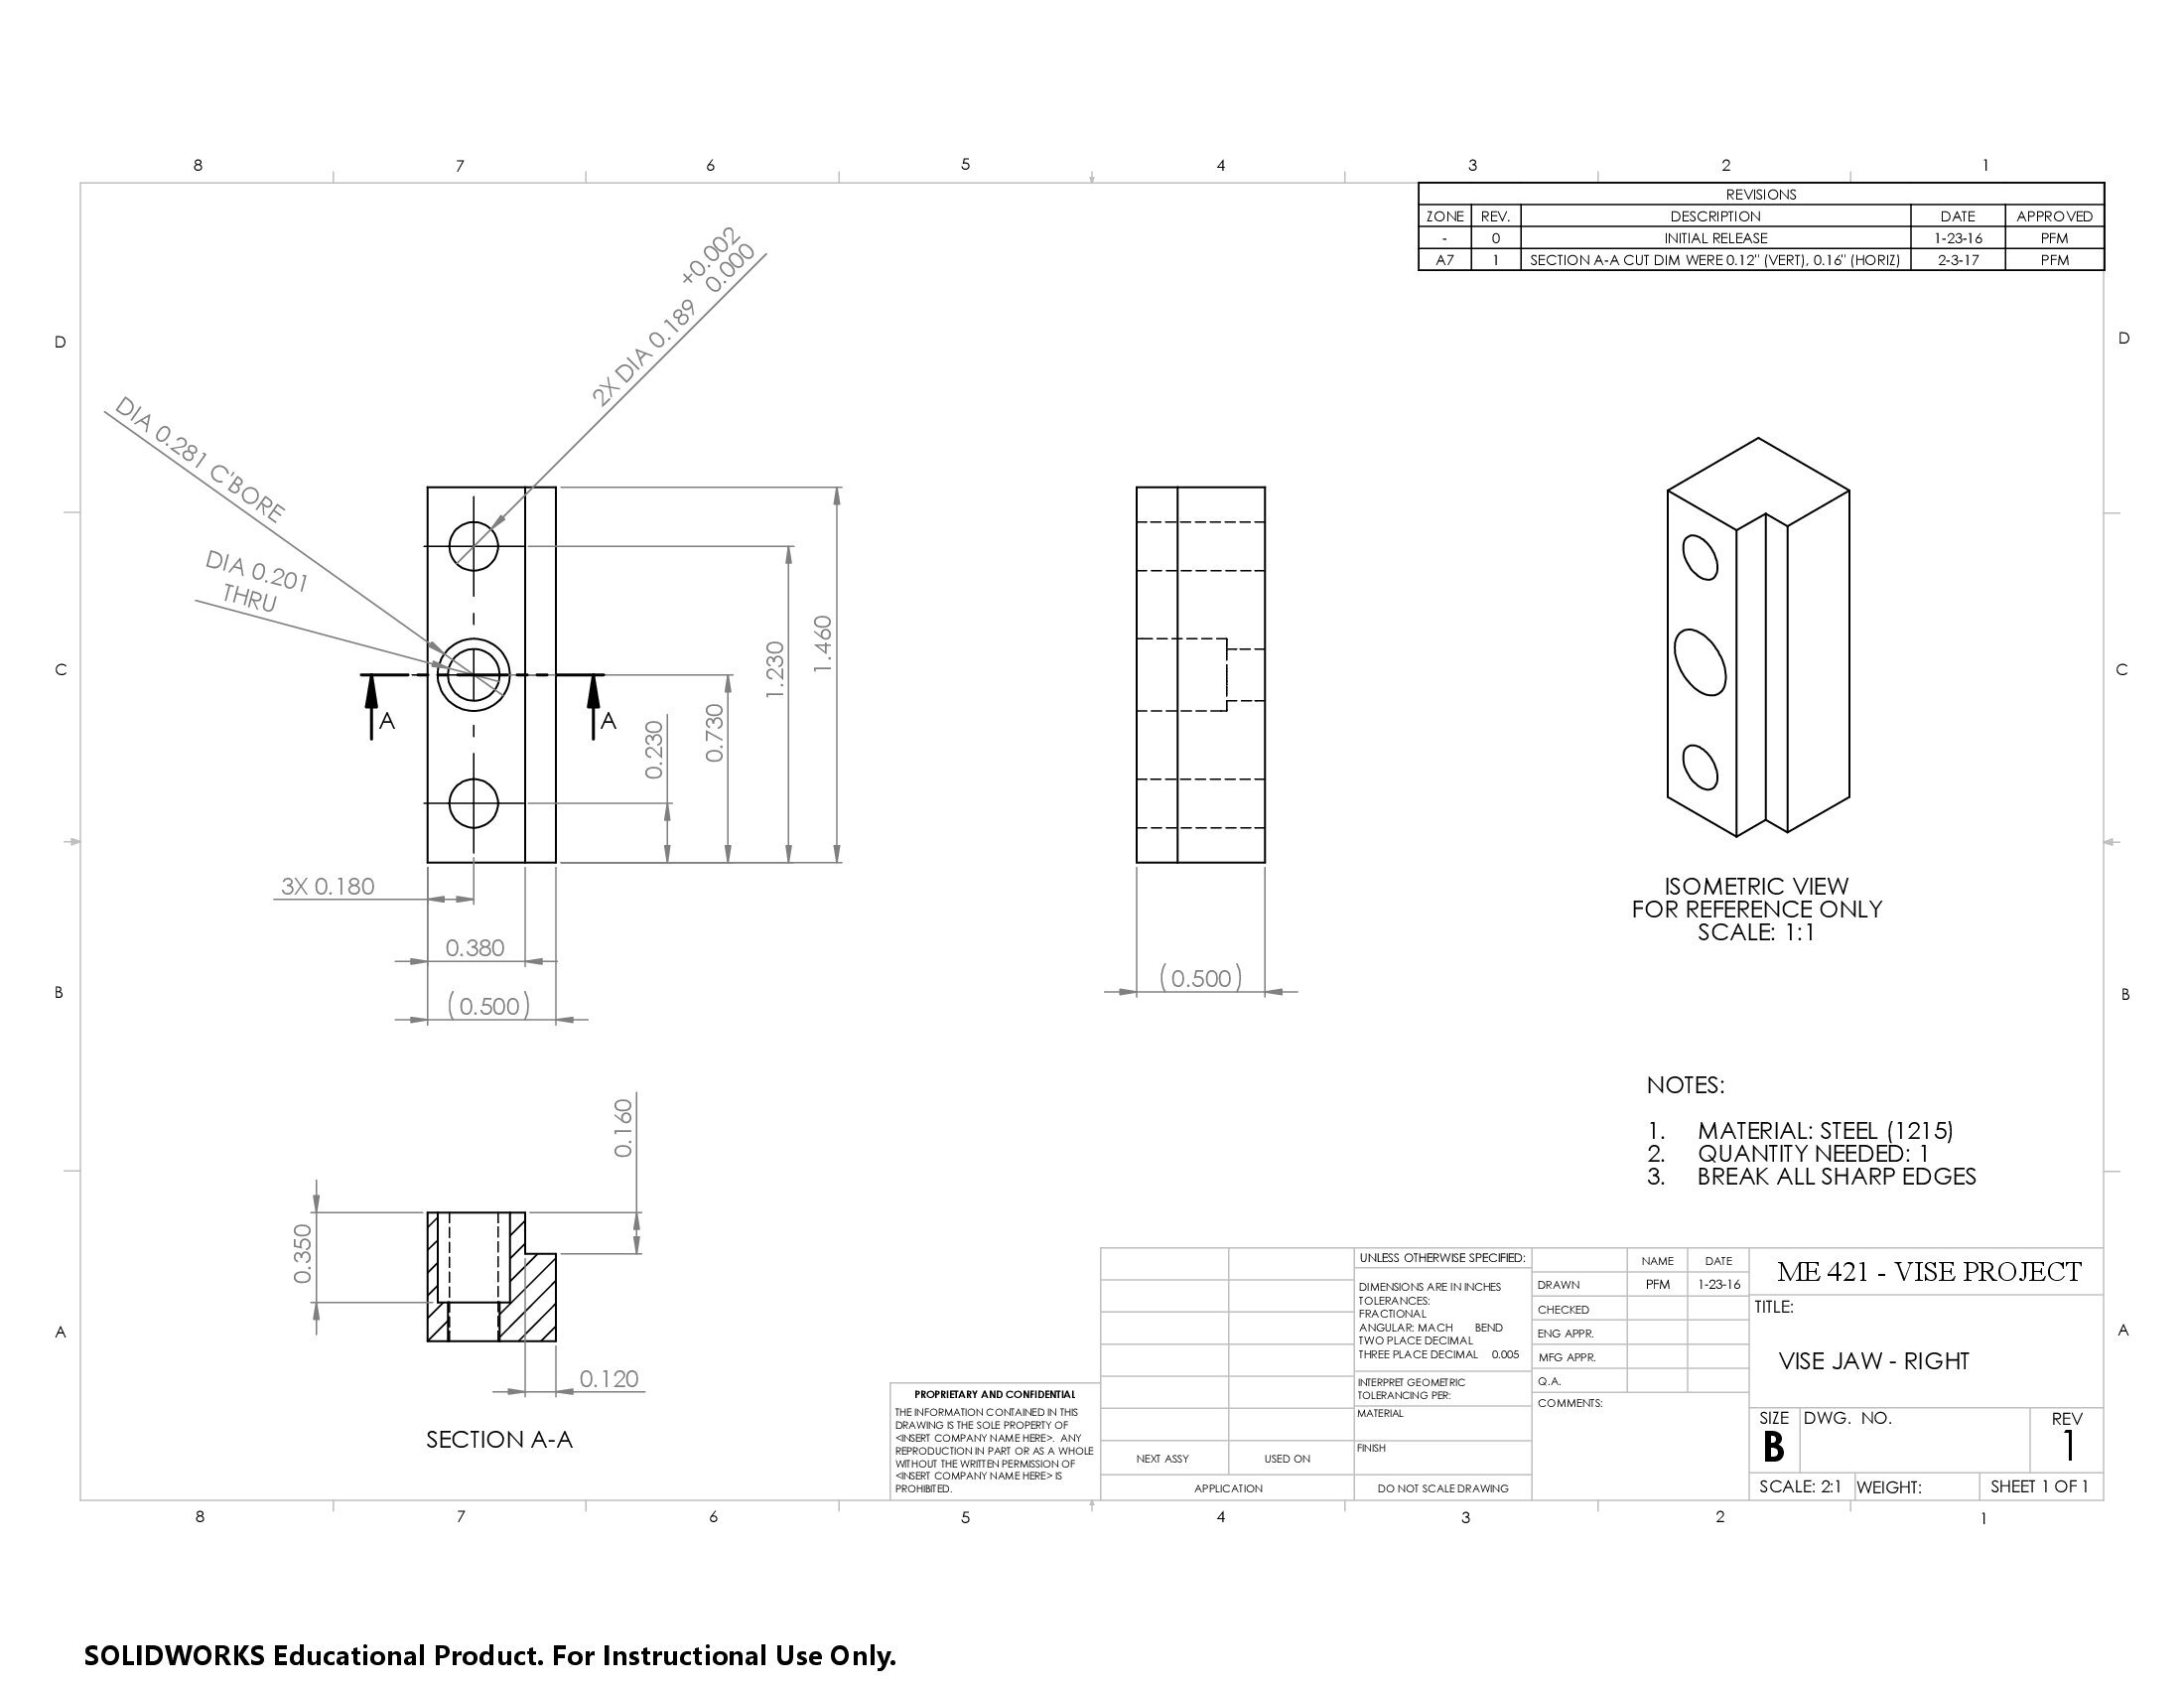
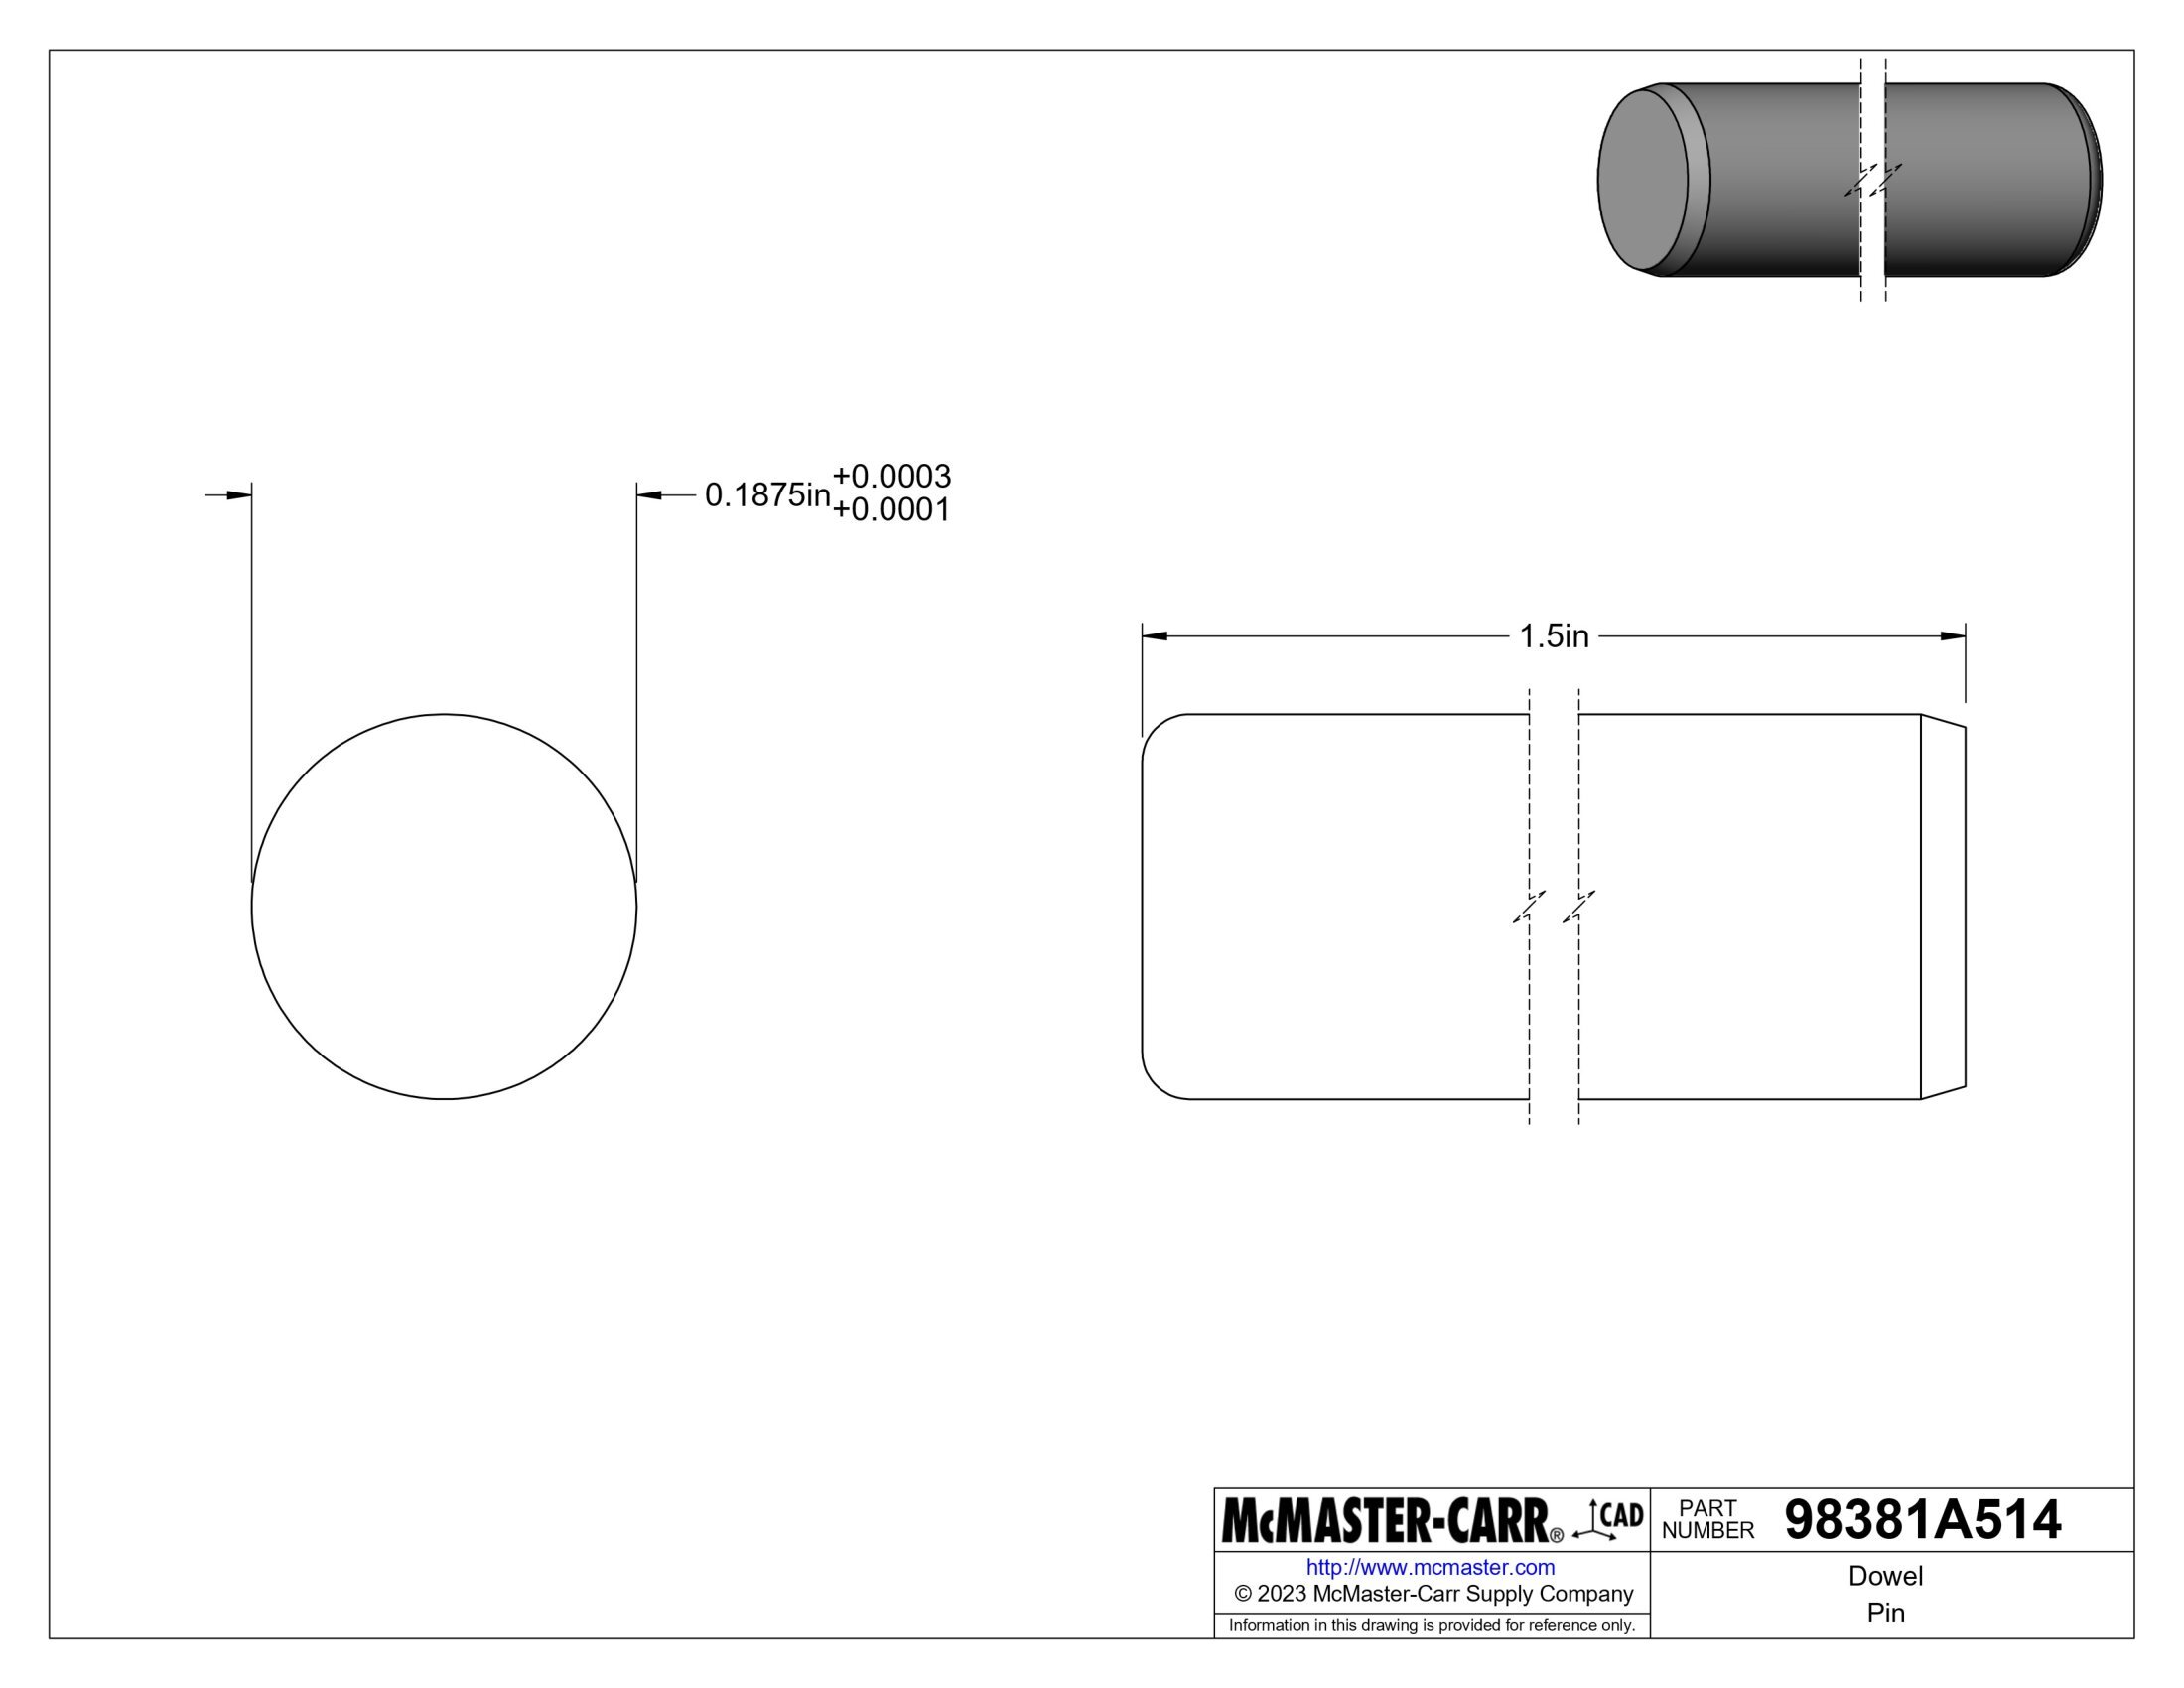
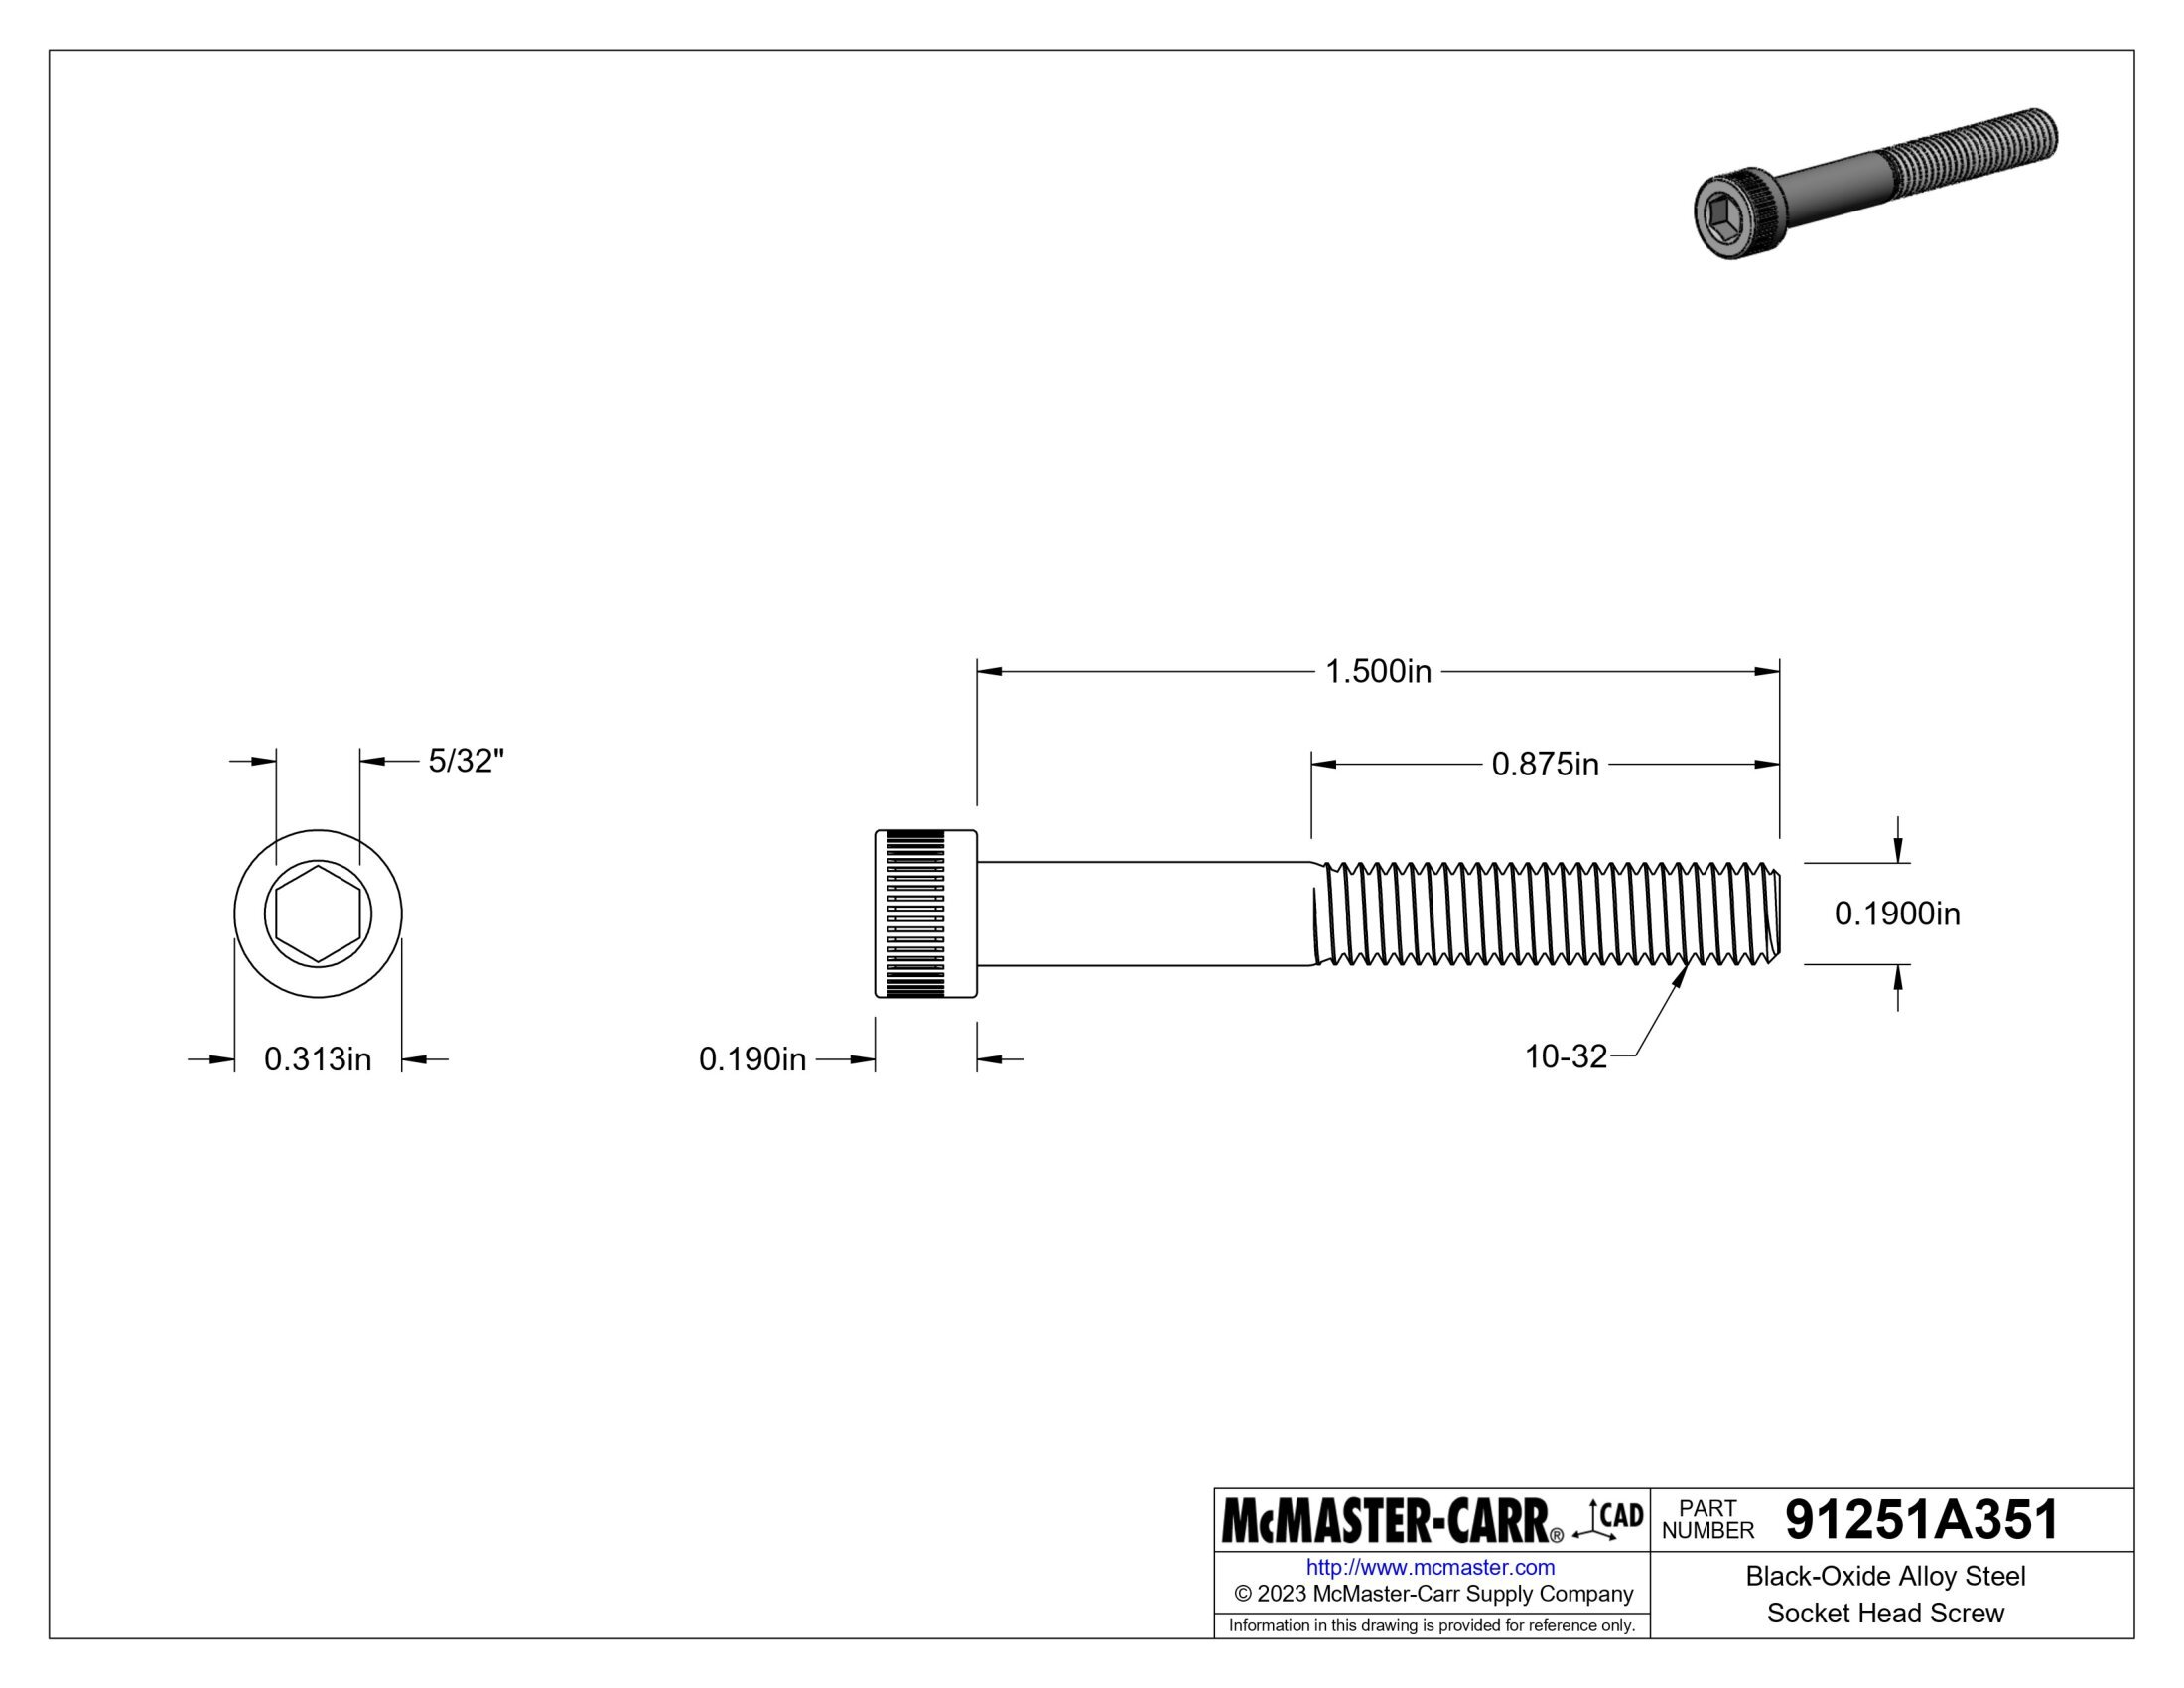
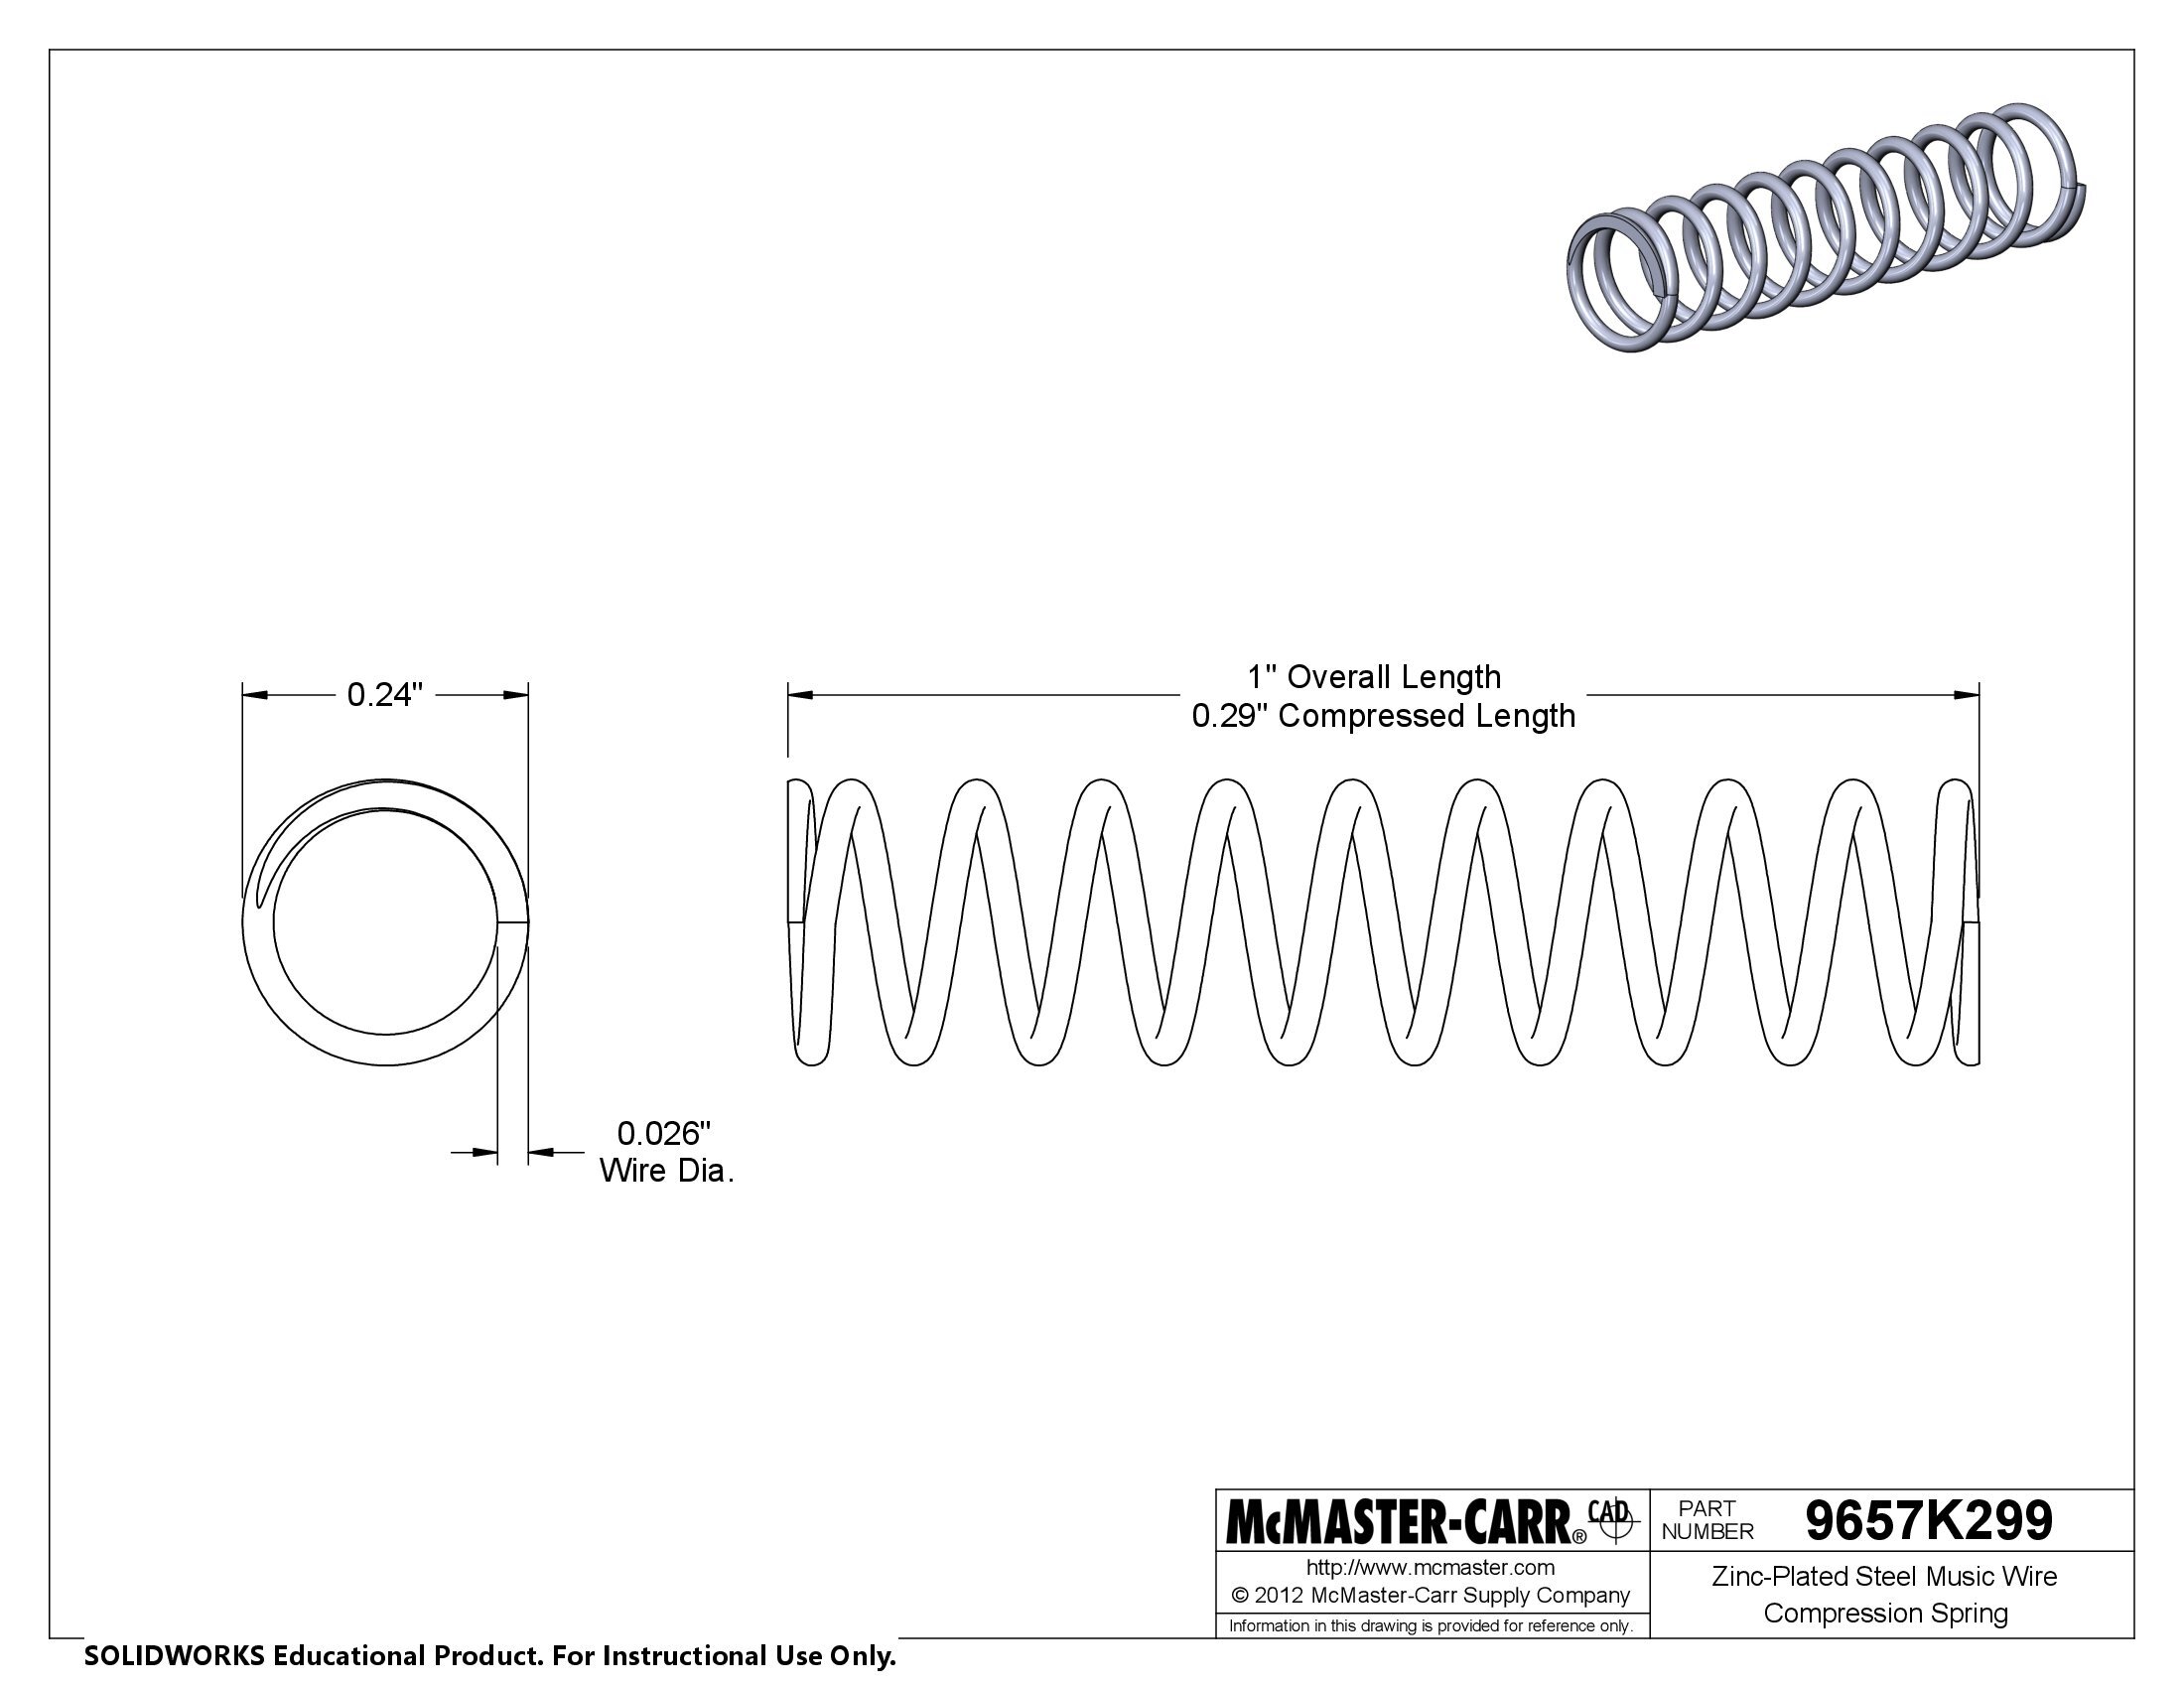
The initial phase involved a thorough examination of the engineering drawings. Each drawing provided a wealth of information, including critical dimensions, tolerances for each part, and specifications for fits and alignments. Understanding these drawings was crucial as they served as the blueprint for the entire machining process. I paid special attention to the tolerances indicated for each component, as they would dictate the level of precision required during machining. The design also required interpreting geometric dimensioning and tolerancing (GD&T) symbols, which conveyed complex information about the form, orientation, and location of various features on the parts.
Selecting the right material was a critical decision in this project. I opted for a steel bar, balancing factors like machinability, durability, and cost-effectiveness. The steel's properties were suitable for the wear and tear expected from a vise stop. The next step was identifying the necessary tools. This stage required a strategic approach to select tools that could achieve the precision demanded by the project. I chose end mills for their efficiency in removing material and drill bits for creating precise holes. Reamers were selected to finish drilled holes to the exact dimensions and tolerances required. Additionally, I considered the type of cutting fluids and lubricants to use, as these would impact the tool's lifespan and the finish quality on the steel.
The actual machining process demanded precision and careful planning. I started by cutting the steel bar into the required lengths, ensuring a bit of extra material was left for the squaring process. Each piece was then methodically machined according to the plans. Precision was key, especially when machining the 'Vise Jaw - Left' and 'Vise Jaw - Right' parts. I used a variety of techniques, including facing, turning, and milling, to bring the pieces to their desired shapes and dimensions. Special attention was paid to critical surfaces that needed to be perfectly flat and parallel. I frequently measured and re-measured using micrometers and calipers to ensure adherence to the tight tolerances specified in the drawings.
Once all parts were machined, the assembly phase began. This was more than just putting pieces together; it involved ensuring that each part fit seamlessly with others as per the engineered fits. During assembly, I also applied my knowledge of fasteners and adhesives to ensure a secure and lasting build. I used techniques like deburring and polishing to refine the parts' surfaces for both aesthetic and functional purposes. The final assembly was then subjected to a series of quality control checks. These checks included testing the vise stop's functionality in a real machining setup and verifying that it met all the design requirements.
Reflecting on this project, I realized it was not just about creating a functional vise stop but also about the journey of applying theoretical knowledge in a practical environment. I learned the importance of meticulous planning and precision in machining. Balancing efficiency with accuracy during the machining process was challenging yet rewarding. This project enhanced my skills in interpreting engineering drawings, selecting appropriate materials and tools, executing precise machining techniques, and conducting thorough quality checks. It underscored the significance of attention to detail in mechanical design and fabrication.
